Simple iPhone Tutorial (Part 3)
With the completion of Part 2, the user interface of your application is almost ready. However, it does not serve much purpose since it does not interact with the users. In this last part of the tutorial, you will add in action handlers using addTarget API and @selector to capture user actions.
7. Adding Action Handlers Dynamically
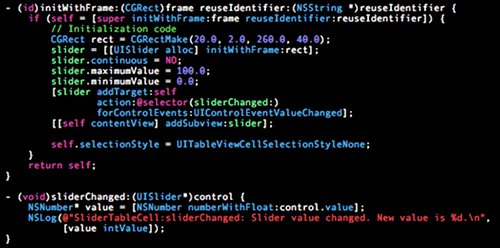
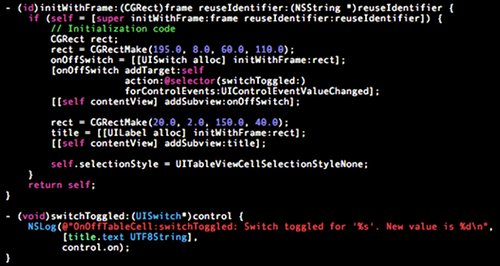
We will now modify the OnOffTableCell and SliderTableCell classes to add in action handlers to handle events that are sent out when the user toggles the on/off switches or slides the bar in the slider control.
The (void)addTarget:(id)target action:(SEL)action forControlEvents:(UIControlEvents)controlEvents and the @selector calls allow you to add your own handlers to handle events for any UIControl classes.
OnOffTableCell.m
SliderTableCell.m

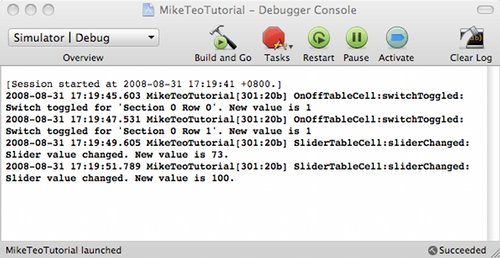
Build and run the application. Open the debugger console in your XCode (Run > Console). You will see the debugging output that are being logged in the console as you toggle the switches and move slider in your first tab view.

You can download Source Code Bundle now to see for yourself how it works.
8. Communicating Changes Across
(There is an additional source code bundle at the bottom of this post which contains the source code for communication changes using notification)
You have learnt how to capture control events. But a sophisticated application do not normally act on such events within a single function. Often, there are multiple points scattered over the application that are focused on handling these events within the scope of their use cases. How can you announce these events to other modules that may be interested in them? And how to make these announcements in a way that the sender and the listeners are loosely coupled to each to the extent that they aren't even aware of each other's existence?
The iPhone SDK (or more specifically the Cocoa framework) defines the NSNotificationCenter class to facilitate such communications. If you are familiar with the Observer-Observable design pattern, the concept of NSNotificationCenter should not be unfamiliar to you. By using (void)postNotificationName:(NSString*)notificationName object:(id)notificationSender API function, the sender can post notifications to interested listeners. Both parties just need to agree upon the common notificationName to use.
We will now adopt the following communication methodology on top of the NSNotificationCenter class.
- Each UILabel objects on the second tab view will listen for notifications from NSNotificationCenter and will have its own functions to update their text value to reflect the conditions of the controls they are listening to.
- The cell rows that contain the UISwitch objects in the first tab view will listen and announce changes in the UISwitch value. The first row will use the notification name "SwitchForRow0" while the second row will use "SwitchForRow1". The notification names for each cell will be initialized in FirstTabViewController.m
- The cell row that contains the UISlider object will listen and announce changes in the UISlider value over the notification name "SliderChanged".
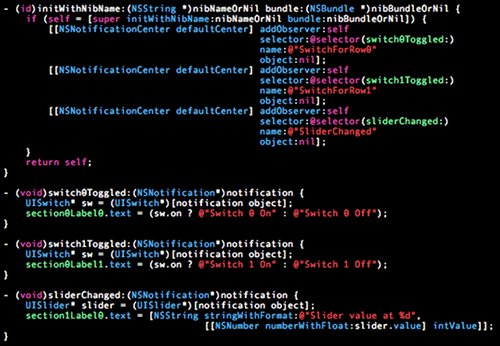
The following code snippets illustrate how the postNotification and addObserver API calls are being used to link up the SliderTableCell and OnOffTableCell classes to the SecondTabViewController class. Notice that the SecondTabView class contains no references to the cell classes. The addObserver calls only contain the notification names.
SliderTableCell.m

OnOffTableCell.m
SecondTabViewController.m

FirstTabViewController.m
Build and run your application now. The labels in the second tab view will reflect the actions you have made on the UISlider and UISwitch controls in the first tab view.
9. Conclusion
Hope you have fun following this 3-part tutorial. Drop me any comments (good or bad) on how I can improve this tutorial :-)


