Simple iPhone Tutorial (Part 2)

In Part 1, we have created a tutorial project, initialized the main screen with 2 tabs, and have attached a custom table view for the first tab. In Part 2, we are going to add a custom form view for the second tab.

5. Adding Child View For Second Tab

The second tab view will be a form-based view. If you are familiar with Visual Basic, you may have "played" around with the VIsual Basic controls by dragging-dropping the controls on the forms and position them according to your needs.

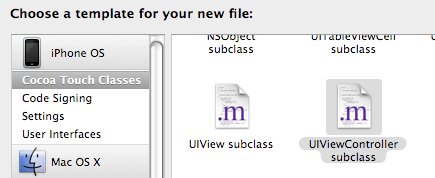
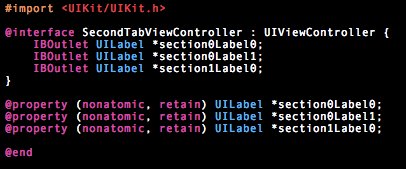
In XCode, create new file called SecondTabViewController using the UIViewController template. We will add 3 UILabel variables.

SecondTabViewController.h
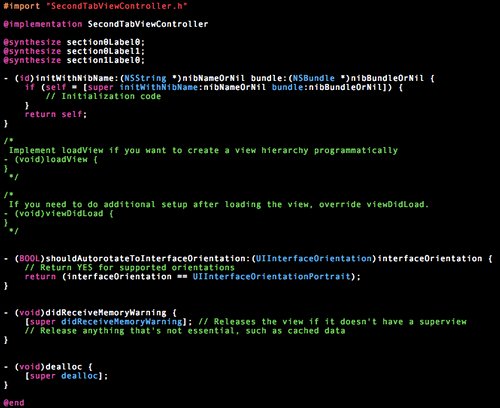
SecondTabViewController.m
Now, create a xib file called SecondTabView using the View template.

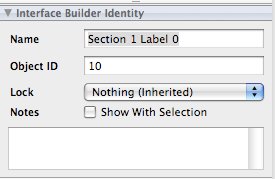
Open the SecondTabView.xib file through Interface Builder. Drag and drop a Navigation Bar Drag and drop 3 Label (it's under Library > Cocoa Touch Plugin > Input & Values) to the View object. You can create some names for these labels--I'm using Section 0 Label 0, Section 0 Label 1 and Section 1 Label 0 so that they match closely to the variable names that we are going to connect to in SecondTabViewController class later on. These names are only for reference within the Interface Builder and do not affect your XCode.
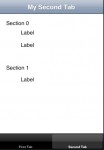
I have added another 2 more labels to indicate the section "headers". Your second tab view will look something like the screenshot below (click to enlarge).

Now, to link up all the objects in the Interface Builder.

  1. Open up the Identity Inspector. Click on File's Owner and set Class Identity to SecondTabViewController.
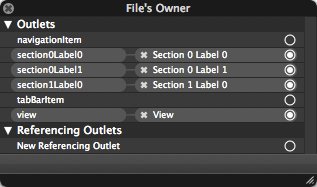
  2. Connect the New Referencing Outlet in View object to the view outlet in File's Owner.
  3. For each of the named labels (Section 0 Label 0, etc), connect the New Referencing Outlet in each label to their corresponding outlet in File's Owner. For example, Section 0 Label 0 connects to section0label0.

After your have done the above connections, the black window for File's Owner should look something like the following:
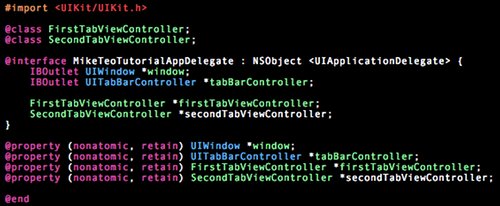
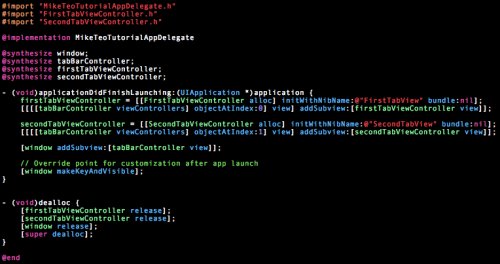
Now, we will add in SecondTabViewController class to MikeTeoTutorialAppDelegate.

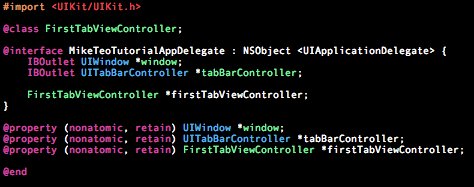
MikeTeoTutorialAppDelegate.h
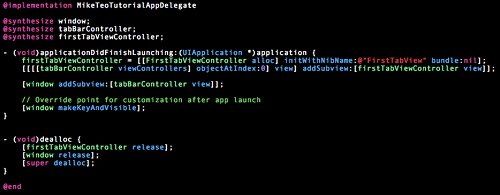
MikeTeoTutorialAppDelegate.m
app3

Build and run. You will see that both tabs are working and the second tab's view contains the labels that you have created (click to enlarge).

6. Generating Custom Table Cells

The table view in the first tab is uninterested as it only displays static information. Most iPhone applications are interactive. We shall customize our own table cells to create on/off switch controls and a slider control.

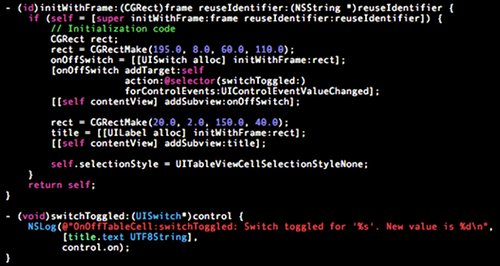
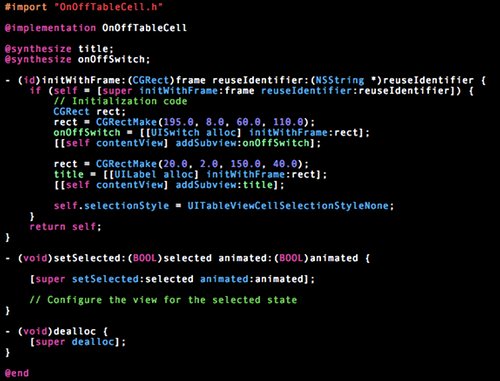
In your XCode, create a new file called OnOffTableCell from the UITableViewCell template. Add in a UILabel variable and a UISwitch variable. Within the OnOffTableCell implementation, we initialize these two variables and hard-coded their position relative to the cell boundary.

OnOffTableCell.h

OnOffTableCell.m
onofftablecell2

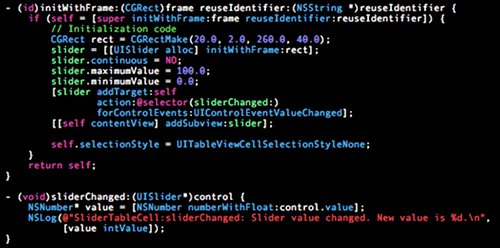
Now, we can create another new file called SliderTableCell from the UITableViewCell template. This class will only have an UISlider control in the cell.

SliderTableCell.h

SliderTableCell.m
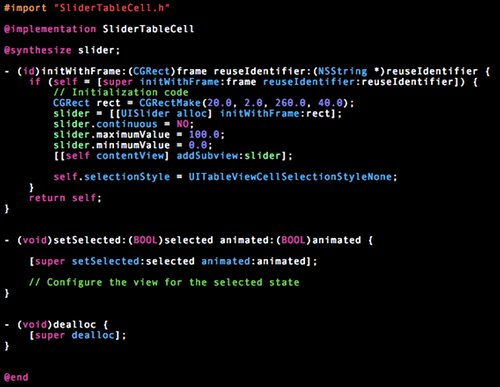
slidetablecell2

Once the table cell classes have been defined, we shall proceed to use these two classes for our table in the first tab view. Import both the OnOffTableCell.h and SliderTableCell.h into the FirstTabViewController.m like this:

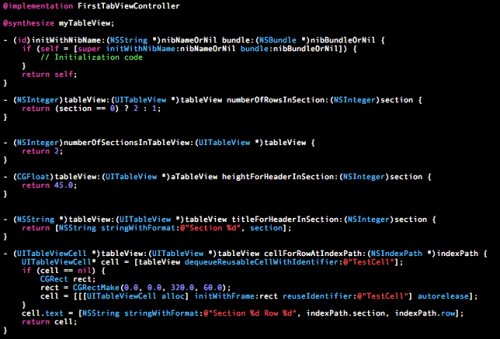
Modify the (UITableViewCell *)tableView:(UITableView *)tableView cellForRowAtIndexPath:(NSIndexPath *)indexPath method in FirstTabViewController.m to return OnOffTableCell instance for section 0 (first section) and SliderTableCell instance for section 1 (second section).

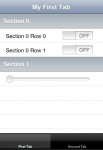
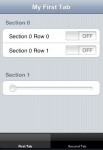
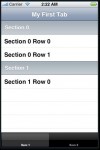
Build and run. Your first tab view will now look this:

As an additional "candy", open the FirstTabView.xib in your Interface Builder. Open the Attribute Inspector (Tools >Attribute Inspector). Click on the Table View object. You should see Table View style being set to Indexed. Change this to Grouped and save.

Rebuild your application. You will see that the table view in the first tab now looks like this:

So far, we have successfully attached two views to a tab control view and use custom table cells to encapsulate a slider and an on/off switch control in the first tab's table view. In the next part, we will programmatically add action handlers to the UISlider and UISwitch controls that have been used in the custom table cells to capture user interactions, and to send their values to the UILabels that have been connected in the second tab view.

Simple iPhone Tutorial (Part 1)

The iPhone developer center provides a great library of information of developing applications on iPhone. However, it assumes that the developer has some relative experience in developing applications on Cocoa. For developers like me who have decided to give iPhone development a try for the first time, there is undoubtedly a great hurdle to leap across.

I have put together this simple howto tutorial to illustrate some of the key features which I have picked from books (books on IPhone SDK development are seriously lacking at this point in time) and online materials that exist in bits and pieces all over the Internet. The illustrated features may not be the best solutions for the problems, but I believe they are rather straightforward and easier to align with my thought process (having come from a few years of development in MFC/Visual C++).

The tutorial will show you how to:

  • Create an iPhone application from an empty application template.
  • Add a 2-tabs tab control view for your main window on your iPhone screen.
  • Create a child view for the first tab which contains a Navigation bar (I use it for the title because it looks good), and a Table view.
  • Create another child view for the second tab which is basically a form-based view designed through the Interface Builder.
  • Load these two child views dynamically from their xib files.
  • Generate table cells which contain a label, and a on/off switch or a slider control through coding
  • Adding action handlers to the on/off switch controls and slider controls in the dynamically-generated table cells.
  • Capturing the changes in the states of the on/off switches and slider controls on the first tab view and display the states on the second tab view (form-based view).

1. What You Need

  • XCode 3.1
  • iPhone SDK
  • A machine to run OS X so that it will run XCode and the iPhone emulator
  • A nice cup of coffee to de-stress yourself :-)

2. Project Setup

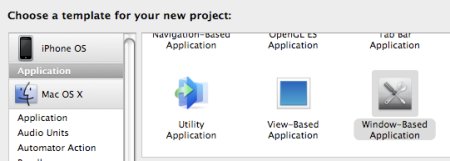
Start XCode. Create a new project called MikeTeoTutorial using the Window-based Application template.

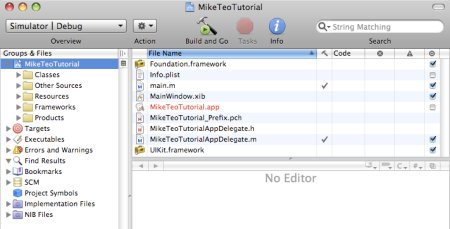
Your minimal iPhone application will be created. It should look something similar to the screenshot below.

3. Main Window

If you build your iPhone application now, it will show an empty white screen.

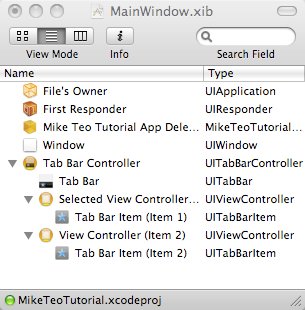
Double-click on your MainWindow.xib. The Interface Builder will start and load the xib file. In the Interface Builder, open up the Library (it's on the Window > Library). Find the Tab Bar Controller (it's under Library > Cocoa Touch Plugin > Controllers). Drag the Tab Bar Controller to your MainWindow.xib window in the Interface Builder.

Now, go back to your XCode and add a UITabBarController object to your MikeTeoTutorialDelegate class.

MikeTeoTutorialAppDelegate.h

MikeTeoTutorialAppDelegate.m

We call window:addSubView to add the tabBarController to the main window. You can use this call to add other views as child views not only to windows but to other views as well. (UIWindow is a subclass of UIView).

Notice that the window and tabBarController variables are both declared with an IBOutlet prefix. This will indicate to the Interface Builder that it can connect to these variables.

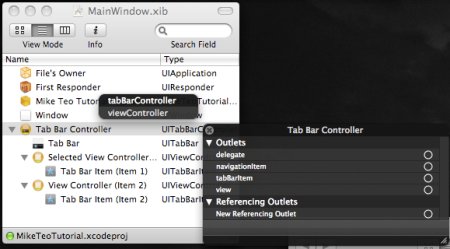
Go back to your Interface Builder. Right-click on the Tab Bar Controller object in MainWindow.xib window. You will see a black popup window showing a list of Outlets. Left-click and drag on the circle beside the New Referencing Outlet row. A blue line will appear as you drag. Now drag this line to the Mike Teo Tutorial Application Delegate object and release the mouse button. Another black window will popup. Click on the tabBarController variable. You will see some form of association has been formed between the tabBarController variable and the Tab Bar Controller object in the xib.

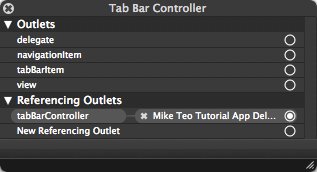
After the connection is setup, the black window will look like the following:

That's how the IBOutlet mechanism works. It allows you to link objects (having the same class, of course) in the nib to the variables declared in the classes in your source codes. If you check the Window object in the Interface Builder, you will notice that it has been already connected to the Mike Teo Tutorial App Delegate. This connection has already been done for you by default when you create this project.

Build your application now and run it. You will see a 2-tab control at the bottom of your iPhone screen, and the tabs works! :-)

4. Adding Child View For First Tab

We shall now begin adding a new view for the first tab. In XCode, add a new file (File > New File) called FirstTabViewController. Choose the UIViewController template.

The view for the first tab will contain a UITableView as one of its child views. We will add a new UITableView variable to allow the Interface Builder to connect to this variable later. We will also subclass UITableViewDataSource and UITableViewDelegate so that this class can act as a data provider for the Table View that we are going to add later in this view. We will return 2 sections: first section has 2 rows while the second section will have 1 row. We will use a default UITableViewCell to show a simple label for each row.

FirstTabViewController.h

FirstTabViewController.m

Now, we will create a new xib file for the first tab. In XCode, add a new file called FirstTabView. Choose the View XIB template.

Open this FirstTabView.xib file through Interface Builder.

  1. Now drag a Navigation Bar from the Library to your View window in Interface Builder. Place it at the top of the view. The Navigation Bar is under Library > Cocoa Touch Plugin > Windows, Views & Bars.
  2. Now drag a Table View from the Library to your View window. The Table View should stretch to fill the remaining space on the window. The Table View is under Library  > Cocoa Touch Plugin > Data Views.
  3. Open the Identity Inspector (Tools > Identity Inspector). Click on the File's Owner in FirstTabView.xib window. You should see the value of NSObject being shown in the Class field. Change this to FirstTabViewController using the drop-down list.
  4. Connect the New Referencing Outlet in View to the File's Owner. You should see a view variable. Connect to this variable.
  5. Connect the New Referencing Outlet in Table View to the File's Owner. You should see the myTableView variable. Connect to this variable.
  6. For the Outlets in Table View, connect both the delegate and dataSource to File's Owner. We can do this because we have set the File's Owner to FirstTabViewController class and the FirstTabViewController class calls conforms both UITableViewDataSource and UITableViewDelgate protocols.

After these steps, you will see a layout similar to the screenshot below (click screenshot to enlarge).

Now, we are ready to add this first tab view to the MikeTeoTutorialAppDelegate files. This will initialize the FirstTabViewController with the FirstTabView xib file.

MikeTeoTutorialAppDelegate.h

MikeTeoTutorialAppDelegate.m

app2

Build and run. You will see your table for the first tab like this:

In Part 2, we shall add in the second tab view and to create more sophisticated table view cells for the first tab view through coding.

Simple iPhone Tutorial (Part 3)

With the completion of Part 2, the user interface of your application is almost ready. However, it does not serve much purpose since it does not interact with the users. In this last part of the tutorial, you will add in action handlers using addTarget API and @selector to capture user actions.

7. Adding Action Handlers Dynamically

We will now modify the OnOffTableCell and SliderTableCell classes to add in action handlers to handle events that are sent out when the user toggles the on/off switches or slides the bar in the slider control.

The (void)addTarget:(id)target action:(SEL)action forControlEvents:(UIControlEvents)controlEvents and the @selector calls allow you to add your own handlers to handle events for any UIControl classes.

OnOffTableCell.m

onofftablecell5

SliderTableCell.m

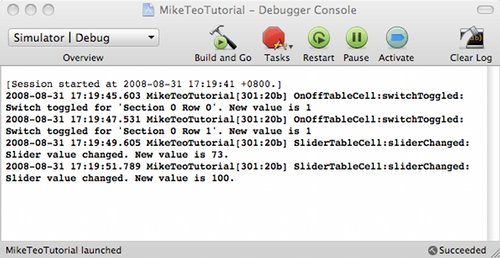
Build and run the application. Open the debugger console in your XCode (Run > Console). You will see the debugging output that are being logged in the console as you toggle the switches and move slider in your first tab view.

You can download Source Code Bundle now to see for yourself how it works.

8. Communicating Changes Across

(There is an additional source code bundle at the bottom of this post which contains the source code for communication changes using notification)

You have learnt how to capture control events. But a sophisticated application do not normally act on such events within a single function. Often, there are multiple points scattered over the application that are focused on handling these events within the scope of their use cases. How can you announce these events to other modules that may be interested in them? And how to make these announcements in a way that the sender and the listeners are loosely coupled to each to the extent that they aren't even aware of each other's existence?

The iPhone SDK (or more specifically the Cocoa framework) defines the NSNotificationCenter class to facilitate such communications. If you are familiar with the Observer-Observable design pattern, the concept of NSNotificationCenter should not be unfamiliar to you. By using (void)postNotificationName:(NSString*)notificationName object:(id)notificationSender API function, the sender can post notifications to interested listeners. Both parties just need to agree upon the common notificationName to use.

We will now adopt the following communication methodology on top of the NSNotificationCenter class.

  • Each UILabel objects on the second tab view will listen for notifications from NSNotificationCenter and will have its own functions to update their text value to reflect the conditions of the controls they are listening to.
  • The cell rows that contain the UISwitch objects in the first tab view will listen and announce changes in the UISwitch value. The first row will use the notification name "SwitchForRow0" while the second row will use "SwitchForRow1". The notification names for each cell will be initialized in FirstTabViewController.m
  • The cell row that contains the UISlider object will listen and announce changes in the UISlider value over the notification name "SliderChanged".

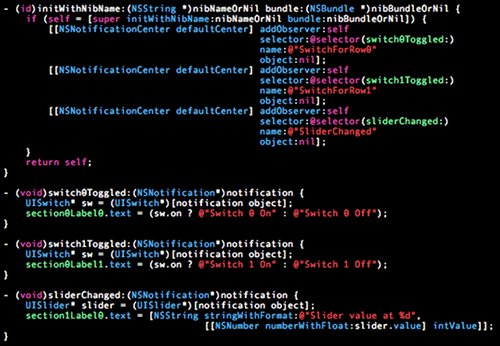
The following code snippets illustrate how the postNotification and addObserver API calls are being used to link up the SliderTableCell and OnOffTableCell classes to the SecondTabViewController class. Notice that the SecondTabView class contains no references to the cell classes. The addObserver calls only contain the notification names.

SliderTableCell.m

OnOffTableCell.m

SecondTabViewController.m

FirstTabViewController.m

firsttabviewcontroller5

Build and run your application now. The labels in the second tab view will reflect the actions you have made on the UISlider and UISwitch controls in the first tab view.

9. Conclusion

Hope you have fun following this 3-part tutorial. Drop me any comments (good or bad) on how I can improve this tutorial :-)

Calculating MD5 Digest with iPhone SDK

The code originates from http://blog.andrewpaulsimmons.com/2008/07/md5-hash-on-iphone.html.

I have copied it here for mirroring purposes. Please express your appreciations to Andrew for his efforts.

#import <CommonCrypto/CommonDigest.h>

NSString* md5( NSString *str )
{
   const char *cStr = [str UTF8String];
   unsigned char result[CC_MD5_DIGEST_LENGTH];
   CC_MD5( cStr, strlen(cStr), result );
   return [NSString  stringWithFormat:
       @"%02X%02X%02X%02X%02X%02X%02X%02X%02X%02X%02X%02X%02X%02X%02X%02X",
       result[0], result[1], result[2], result[3], result[4],
       result[5], result[6], result[7],
       result[8], result[9], result[10], result[11], result[12],
       result[13], result[14], result[15]
   ];
}